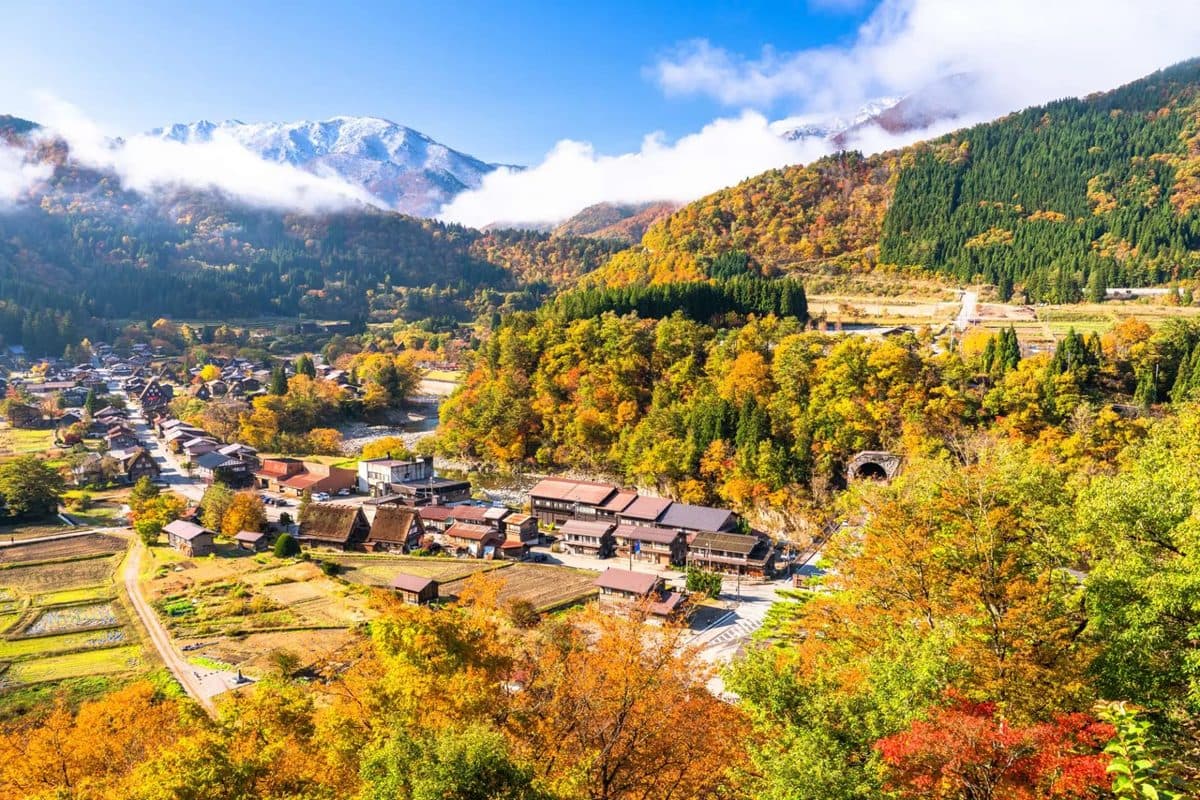
Travel photography is a beautiful way to freeze and share your adventures with the world. Whether you’re just snapping pics on your phone or wielding a DSLR, capturing the essence of a place is a rewarding challenge. The key to great travel photography is knowing your camera and planning your shots. It’s not only about taking pictures; it’s about telling a story through your lens.
One of the best times to take photos is during the golden and blue hours—after sunrise and before sunset. This light can make your photos pop with color and depth.
Don’t just rely on your location’s stunning beauty; learn about composition and try different framing techniques to add more impact to your shots. Sometimes, moving a few feet in any direction can dramatically change your picture.
On a personal note, asking people for permission before taking their photo can lead to some of the most genuine and memorable portraits. Engaging with locals brings a human element to your photos and enriches your travel experience.
Remember, every place has its vibe, and your unique perspective will make your travel photos truly yours.
The Importance of Lighting
When you’re out capturing the world, lighting is your best friend. Natural light can make or break a photo. Pay attention to the time of day you shoot because light changes throughout the day.
Early morning and late afternoon are known as the golden hours. The light is soft and warm during these hours, creating beautiful, flattering shadows.
In contrast, midday light can be harsh and create strong shadows. If you’re shooting around noon, look for shade. You can still get great shots without the glaring sun in your way.
Don’t be afraid to experiment. Sometimes, shooting against the sun can create stunning silhouette photos. It’s all about playing around and seeing what works.
A reflector can be a great tool when natural light isn’t cooperating. A simple, portable reflector helps you bounce light back onto your subject.
Tip: If you don’t have a reflector, a plain white sheet of paper can work in a pinch.
List of Essential Lighting Tips:
- Golden Hours: Use early morning or late afternoon light.
- Avoid Harsh Midday Sun: Seek shade or use a diffuser.
- Experiment: Play with silhouettes and backlighting.
- Reflectors: Always carry one for better control.
Light isn’t just about brightness, though. It’s also about direction and quality. Side lighting can add depth and dimension. Front lighting, on the other hand, can create a flat look.
Try shooting in different weather conditions, too. Overcast days can actually be a blessing, providing even, diffused light.
When you’re traveling, light will change based on location. The quality of light in Paris during winter is different from that in Bali during summer. Adapt to your surroundings and always watch how light interacts with them.
You’re on an adventure to see new places and capture them in their best light.
Framing and Composition
When it comes to travel photography, framing and composition are key. They can distinguish between a snapshot and an image that tells a story.
Rule of Thirds
Imagine your photo divided into nine parts: two equally spaced horizontal lines and two equally spaced vertical lines. Place important elements along these lines or at their intersections. This brings balance and interest to your photos.
Natural Frames
Use elements like windows, arches, or trees to frame your subject. This technique draws the viewer’s eye towards the main focus and adds depth. For instance, I once framed a shot of the Eiffel Tower through the arches of a nearby building – the result was stunning!
Leading Lines
Lines guide the viewer’s eyes to the subject. Roads, rivers, or even paths make excellent leading lines. During a trip to Scotland, I used a winding road leading up to a castle, and the effect was dramatic.
Use Foreground Elements
Integrate elements from the foreground, such as flowers or grass, to add layers to your images. A shallow depth of field can make the background out of focus while keeping the foreground sharp, adding a sense of dimension.
Patterns and Symmetry
Seek out repeating shapes or lines, like a row of palm trees or tiled rooftops. Like a perfectly mirrored reflection in a lake, symmetry in architecture can create powerful images.
Change Your Perspective
Don’t just shoot from eye level. Get down low or find a higher vantage point. During a hike, I lay on the ground to capture a field of wildflowers against the sky, which completely changed the shot’s impact.
Stay curious, experiment with these techniques, and your travel photos will instantly improve.
See Related: Do Disposable Cameras Get Ruined in Airport Security? Tips for Travel Photography
Editing Techniques
Editing your travel photos can make a big difference. Small tweaks can turn a nice picture into a fantastic one. Here are some tips to help you get started.
1. Cropping
Use the crop tool to improve composition. A good crop can remove distractions and focus on the subject. Try changing the aspect ratio—go from a rectangle to a square to see what works best.
2. Adjusting Exposure
Photos can be too dark or too bright. Use exposure adjustments to bring out the best in your shots. Increasing exposure can lighten a dark image while reducing it can bring back details in a too-bright photo.
3. Boosting Colors
Vibrant colors make an image pop. Use the saturation and vibrance tools to enhance colors. Be careful not to overdo it; you want your photos to look natural.
4. Sharpening
A little sharpening can make your photos crisper. This is especially useful for landscape shots. Adjust the settings slowly, as too much sharpening can create an unnatural look.
5. White Balance
The light in a photo can sometimes be too cool or too warm. Use the white balance tool to correct this. Adjust until the colors in your photo look true to life.
6. Filters and Presets
Filters can quickly change the mood of your photo. Many editing apps offer preset filters. Experiment with these to find one that enhances your image without overwhelming it.
7. Remove Imperfections
Use tools to remove unwanted spots or objects. Blemish removal tools can help clean up portraits, and cloning tools can erase distractions from the background.
Editing can seem overwhelming, but it will become second nature with practice. Experiment with these techniques to find your style. The more you edit, the better you’ll get!
Use of Colors
Colors can make your photos pop. When you use colors well, your travel photos will stand out. Think of how blue works with yellow—like a bright blue sky with sunflowers.
Take a look at a color wheel. It’s handy for finding colors that go well together. Red and green are another classic combo, like Christmas decorations.
Sometimes, you need to consider the mood. Warm colors like red, orange, and yellow can make a photo feel lively. Cool colors like blue and green can create a calm feeling.
When you’re on the move, look for vibrant colors around you. A bustling market with colorful stalls or a street filled with bright murals can be great photo spots.
Don’t be afraid to mix colors. Your photos can be more interesting with a burst of many hues. Imagine a busy scene in India with people in colorful clothes.
You can also use color to guide the viewer’s eye. A single bright color in a dull scene grabs attention. Think of a red umbrella on a gray, rainy street. This technique can make your travel shots memorable.
Play around with different combinations. Take lots of photos and see what you like. Every click helps you understand colors a bit more. Have fun with it, and let your travel adventures inspire your creativity.
Capturing Local Culture
When you travel to capture local culture, you’re diving into an adventure that goes beyond snapping pretty landscapes. You aim to tell a story, convey emotions, and showcase a place’s heartbeat.
1. Interact with Locals:
Get to know the people. Chat with a shop owner, join a family for a meal, or just hang out where locals hang out. This helps you get more genuine shots and often leads to interesting stories.
2. Attend Local Events:
Festivals, markets, and community gatherings are goldmines for capturing local traditions and cultures. These events are full of colors, emotions, and unique moments that can shine through in your photos.
3. Be Respectful:
Always ask permission before photographing people, especially during personal or emotional moments. A smile and a simple request can go a long way. Respecting people’s privacy will also help you build trust with the community.
4. Observe and Learn:
Spend some time just observing. Notice how people dress, their daily routines, and how they interact. This will help you capture natural, candid moments that truly reflect the local way of life.
5. Focus on Details:
Sometimes, small details tell the best stories. Think about the texture of hand-woven fabrics, the pattern of pottery, or the arrangement of goods in a market. These close-up shots can add depth to your travel photography collection.
6. Embrace the Unexpected:
Not every shot will be perfect, and that’s okay. Sometimes, the best photos come from unexpected moments. Keep your camera handy and be ready to snap when something interesting happens.
7. Use Natural Light:
Natural light enhances the authenticity of your photos. Early morning and late afternoon, known as the golden hours, offer the best lighting. This brings out rich colors and soft shadows, making your images look warm and inviting.
Example: I once visited a village in Vietnam during their Lunar New Year celebrations. By spending time with a family, sharing meals, and understanding their customs, I captured heartfelt moments that truly reflected their culture.
By focusing on these aspects, you’re not just taking photos—you’re creating visual stories that have the power to connect with anyone who views them. Happy snapping!
See Related: The Ultimate Budget Travel Planner Checklist
Timing and Patience
Timing and patience are key in travel photography. You need to think about the best time to shoot. Sometimes, you have to wake up early or stay out late. The light at sunrise and sunset can be magical.
Imagine setting your alarm for five in the morning. The streets are empty, and the soft morning light makes everything glow. You might need to wait for the perfect shot, but it’s worth it. That’s the patience part.
Example Timing Tips:
- Early Mornings: Soft light and fewer people.
- Golden Hour: The hour after sunrise and before sunset has the best light.
- Blue Hour: This is right after sunset and just before sunrise. It gives a cool and moody effect.
Do you have a favorite spot you want to capture? It might be crowded. Think about going off-season or waiting for the crowd to thin out. You can capture a scene without people blocking the view if you’re patient.
Ever been stuck waiting in one spot for hours? I have. One time, I waited almost an hour in Florence to get a shot of the Ponte Vecchio without tourists. It tested my patience, but the results were stellar.
Quick List of Patience Practices:
- Scout Locations: Know where you want to shoot in advance.
- Be Ready to Wait: Good shots often come to those who wait.
- Practice Mindfulness: Stay calm and enjoy the moment. The perfect shot will come.
A little patience and good timing can lead to truly stunning travel photos. So, take a deep breath next time you’re out with your camera, wait for that perfect light, and enjoy the process.
Experimenting with Angles
One of the most effective ways to make travel photos pop is by playing with angles. Trust me, getting creative with your perspective can turn an ordinary shot into something truly special.
Ever tried crouching down low, almost at ground level? This can give a dramatic sense of scale, especially with tall monuments or towering trees.
On the other hand, climbing up high or finding a vantage point can offer an entirely new view of the scene below. Think of a cityscape from a rooftop or a bustling market from a balcony.
Pro Tip: Always have a versatile lens handy. A wide-angle lens can change the feel of your photo.
Also, don’t be afraid to tilt your camera slightly. A small tilt can add a dynamic element, making the shot more interesting. It’s not about following the rules but about creating something unique.
Angles aren’t just about up and down; think about the sides too. Try shooting straight on, from the left, right, or behind an object. This can add depth and layers to your image.
Here’s a personal tip from my travels: I always take a photo from where people least expect it. Once, I knelt in the middle of a crowded street to capture the reflection of a historic building in a puddle. It’s now one of my favorite shots.
Remember, experimenting with angles is all about having fun and seeing the world from a different perspective. So, tilt, crouch, climb, and explore the endless possibilities!
See Related: Our Favorite Europe Travel Tips for This Year
Showcasing Your Photos Effectively
You’ve taken some amazing travel photos, and now you need to showcase them in a way that grabs attention. Here are some friendly tips to help you out:
1. Choose the Right Platform
- Instagram: Great for reaching a broad audience. Use hashtags and geo-tags.
- Personal Blog: Ideal for sharing stories along with photos.
- Facebook: Connects you with friends and family easily.
2. Create Engaging Captions
- Describe what you felt at that moment.
- Share a fun fact or a quick story.
- Ask questions to engage your audience.
3. Use Collages and Grids
Showcase multiple photos from a trip in a single post. Apps like Canva or Adobe Spark can make this easy and visually appealing.
4. Curate Your Best Work
Don’t post every photo. Pick the truly unique ones. Less is more when it comes to showing your best shots.
5. Consistent Aesthetic
Stick to a color scheme or a particular style. It makes your feed look cohesive and professional.
6. Print and Frame
Sometimes, digital platforms aren’t enough. Print your best shots and frame them. They make great decor and conversation starters at home.
7. Participate in Photo Contests
Enter your photos in competitions. It’s a great way to get noticed and even win some prizes.
8. Photo Galleries on Websites
Create photo galleries on your website. It gives a gallery-like experience for your visitors.
9. Watermark Your Work
To protect your photos, add a subtle watermark. It helps in case your photos are shared widely.
Engaging with followers by replying to comments can also boost your presence. Sharing your behind-the-scene stories or how you captured a difficult shot adds a personal touch and builds a connection with your audience.